o A fun & educational computer game (full description)
o See Screenshots
Get It
o Download the full version
Play It
o Learn the basics
o Play the web version
Expand It
o Create your own cards
o Get new decks from the Library
Contact
o Subscribe to the e-mail list
o Roadmap
o Contribute
o e-mail me
Someday, I will provide a program to help in creating your own decks. But until then, making them by hand isn't hard. Edit a simple file, create pictures to go with it, and that's it! If you want to zip all the files up together to make it easier to send to other people, then you can do that, too.
The ".cards" File
Each deck is described by a plain text file that ends with ".cards", such as the sample deck "jonathans.cards". These files simply list the cards that make up the deck; the card names and the pictures that go with them. To edit a card file, you'll use a text editor, like Windows Notepad or Mac TextEdit.PicturesHere's a sample from a card file, and the card that it creates (the parts you can change in your deck are shown in bold):
<card wordtype="noun">
<text>and a bird</text>
<picture>everyday/bird.jpg</picture>
</card>
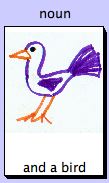
A deck is simply a bunch of these entries. You'll have many of the same word type ("noun" in this example). For each one, you put the name of the card between the
<text>and the</text>tags, and the path to the picture file between the<picture>and</picture>tags. That's it!
The pictures for each card can be either GIF (.gif) or JPEG (.jpg) format. Your scanner or digital camera software should be able to save your pictures to one of these two very common formats.The cards will only show the center 100 pixels wide by 130 pixels tall of your pictures. If they're bigger than that, you can use photo editing software to crop your pictures down to that size, or else some of the picture will be cut off.
If you want to draw pictures on paper, and scan them for use in Storycards, these simple grid pages might be helpful. Be sure to draw as big and dark as possible, so the pictures can still be seen when they're scanned and shrunk down to size. (You'll need the free Adobe Reader to open and print these grid pages.)
- Small cards (16 per page)
- Large cards (4 per page)
The path to the picture is the directory it's in, plus the filename. So in the example above, the picture file is "bird.jpg", and it's located in the directory "everyday". This directory is located in the "decks" directory wherever you installed Storycards.
Pictures aren't required. If you don't have a picture for a word, just leave the space between the
<picture>tags empty. A framed question mark picture will be shown for any cards that Storycards can't find a picture for.
Other Deck Info
In addition to the cards themselves, there is a little more information in the deck file. At the beginning of the file is where you put the name of the deck, your name, and a version number.Putting It All Together
<deckinfo>

		    <title>Jonathan's</title>

		    <version>1.0</version>

		    <author>Jonathan Grayson</author>

		</deckinfo>
To see all these pieces together, check out this sample card file. It includes the deckinfo, five nouns, five verbs and five adverbs.
Copyright © 2002, 2003 - Chris Grayson